On August 17, 1996, I purchased a new, leftover 1994 Yamaha GTS-1000A. Yamaha-USA had been quite helpful, supplying me with a list of dealers in my area with new bikes in stock.
The day I picked up the bike, literally on my way home, I began modifying the thing...I installed a pair of wide-angle adjustable mirrors.
Here's a list of the various things I've done to the bike since...
I had plans to go up to Canada from New York city for the annual
Canadian Assault, followed by a week's travel thoughout
New England.
However, there was one problem looming...
The GTS did not have saddlebags, though I knew from the 'net
GTS mailing
list
that they did exist. One thing I appreciated very much from my BMW were
hard saddlebags, and I had set out to find a pair even before riding the
bike home. Yamaha-USA didn't have any leads, and the larger Yamaha parts
dealers didn't have bags available. Finally, I ended up purchasing what I
was told were the last set of GTS bags in Canada! Due to complications
with shipping (US Mail to ease the customs issue), I didn't receive the
bags until the night before I was due to leave for Canada. It was quite
unnerving to be sitting outside in the semi-dark, drilling holes in
the plastic bodywork of my new bike! The bags fit fine, and work great!
Tulsa Enterprises
7722 Talbert Avenue
Unit E
Huntington Beach, CA 92648

714-841-1767
714-841-7047 (fax)

Multi-view mirrors (Small)
Part number Y15400
Reviewed in Motorcycle Consumer News
I cannot recommend Peter highly enough. Though I bought the alarm from a dealer, not from him directly, he has consistently helped me out. I've had some problems with the system, mainly related to the remotes. Over the 3+ years, Peter has sent me replacement components, with free upgrades along the way. I would buy a current model from Peter with virtually no hesitation.
That said, I'd probably try a custom seat from someone else if I was buying a new seat today.
Unfortunately, the GTS headlamp lens and reflector assembly is a poor combination. It's very difficult to find a setting that's appropriate--if the lamp is aimed correctly for the low beam, the high beam is great for spotting on-coming aircraft. If the high beam is correct and not blinding other drivers, then the low beam is pointed too far down.
Initially, I replaced the stock headlight bulb with an 80/100W bulb. I also installed a ceramic H4 socket and high-temperature leads, to deal with the increased heat output from the higher wattage bulb. This combination was fine, but I wanted more. More, more, more!
I've now got an HID (High Intensity Discharge) lamp in place of the stock assembly. A High Intensity Discharge lighting system uses gas-filled lamps that produce light when a high voltage current (~35KV) produces an arc within the enclosure. The kit I got consists of:
an HID bulb (low-beam only) fitted with an H4 base, so no modification of the stock socket or wiring is neededThe light from the HID bulb is significantly brighter than the 80/100 bulb I ran previously, and the unit only draws 35 watts. Note that all HID kits are low-beam only, so you'll need some kind of high beam as well (they are idea for bikes with 2 headlight bulbs).
the igniter unit, about the size of 2 packs of cigarettes; the fixed cable to the bulb is about 12 inches
a relay
installation wiring and connectors
I got mine from HID Lights
in Maryland, but there are a few other companies that sell HID
kits for bikes.
Driving Lights
OK, so I've got the fancy-schmancy HID headlight...what to do for
highbeams? I mounted a pair of PIAA
model 1000 driving lights. They fit neatly
using slightly longer bolts (included with the lamps) through the
existing fairing mounting brackets.
At only 45W each, they provide a good driving light, letting me see where the road goes and hopefully, if there's Bambi in the way!
I installed the lights so that they are powered directly off the battery. A male H4 plug, connected to the stock headlight socket, switches the relay. This way, the stock wiring is unchanged, and the stock headlight high-beam swith controls the PIAA driving lights without overloading the switch.
 This annimated image shows the bike without any lights on, with just the HID
lamp on, and then with the PIAA driving lamps on. The wildly differing
backgrounds are caused by the camera's attempt to expose correctly when the
lights were on, severely underexposing the background.
This annimated image shows the bike without any lights on, with just the HID
lamp on, and then with the PIAA driving lamps on. The wildly differing
backgrounds are caused by the camera's attempt to expose correctly when the
lights were on, severely underexposing the background.
My subjective impression is that the HID lamp produces much more effective
light than the low-beam of an 80/100W halogen bulb. The beam is broad, smooth,
and bright enough to extend further down the road.
The PIAA model 1100 driving lamps aren't as narrow-beam as I originally
wanted. They provide effective light up to about 150~200 feet, but the pattern
is broad, lighting the trees overhead, the sides of the road, and the ground.
This is actually good, as it lets me spot Bambi and the general curve of the
road, rather than creating a narrow "tunnel" of light.
However, the HID lamp also
exposes any flaws in the GTS headlight lens and mirror assembly.
I don't know
whether this is due to the very intensity of the HID lamp,
the position of the lamp capsule on an H4
socket, or the shield that's added to the socket to block the "high beam"
angle of the lamp.
Update: I needed to replace the HID bulb (ouch!), and got a bulb and machined billet h4-to-HID "adapter" from Casper's Electronics, and that adapter puts a standard HID bulb in a much better position than the previous bulb (which had an H4 base grafted on). The light output is brighter, more even, and with less glare.
I firmly believe that the real secret to keeping the chain alive is that constant flow of light lubricant. I'm using ATF fluid instead of the proprietary ScottOil. I think that sticky chain lubes actually hold onto fine dirt, turning it into a lapping paste that eats away at the chain & sprockets. The light oil from the ScottOiler washes that crud off the chain (and onto the sidestand, wheel, and inside of the belly fairing, but that's another story).
The upsides are:
vastly increased chain life
you'll never have a rusty centerstanThe downsides to the ScottOiler:
messy rear whee
adjusting the flow correctly
it's not self-priming if it runs dry (it's a pain to re-fill, but nothing you can't do in a parking lot in France with some transmission fluid and a turkey baster and a paper cup...and I don't speak French)
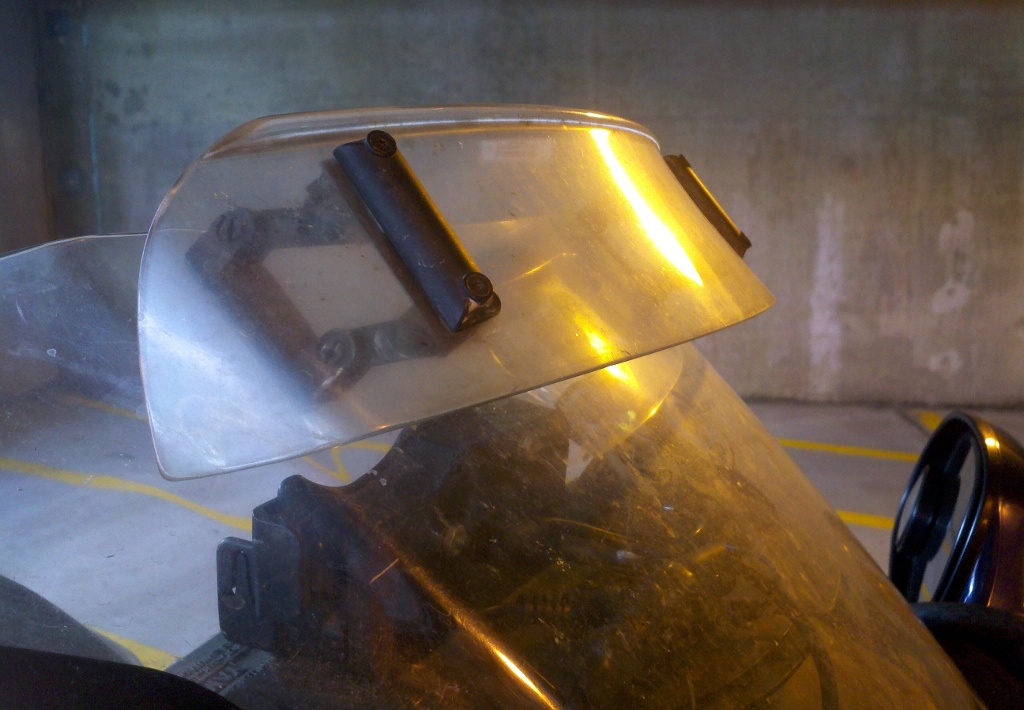
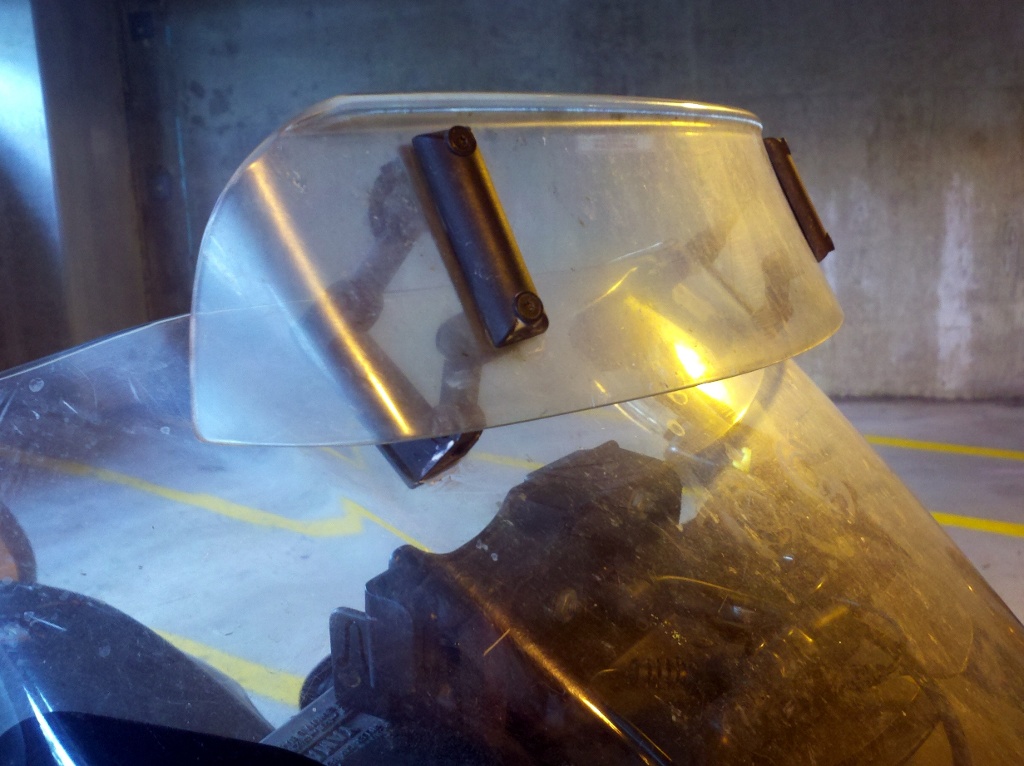
Here are some photos of the dirty windscreen (it shows up better that way on
camera!) at various heights:

![]()